
Here is the crochet baby booty pattern I used and some hints if anyone else wants to try and make these.
I used a size G hook with Micro Spun Lion Brand Yarn, which is really soft and cuddly. Instead of using 3 colors I only used 2. So I used the same blue/periwinkle yarn for the main color (MC) and Color A (CA) and then the purple for Color B (CB).
The first thing I learned is that it is key to pay attention whether it says to crochet in the space or in the stitch. When it refers to the "Ch2 space" it means the big empty holes in pictures 1 and 2. At first I crocheted in the stiches and then I ended up with an octogon instead of a square after completing the "Granny Square Instep" section.
The second tip I have is that you should make sure your stitches stay tight. After my first try my stitches were pretty loose and the whole thing was too big.
The following is a progression of the steps. I kind of had a hard time figuring out which way to go after each section, so hopefully this helps someone else.
After 1st part of Granny Step Instep:
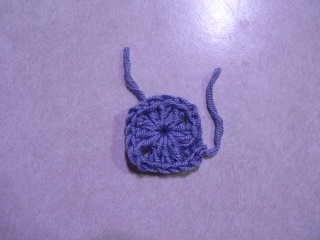
The completed Granny Square Instep:

After 1st part of ankle ribbing:

After 2nd part of ankle ribbing:
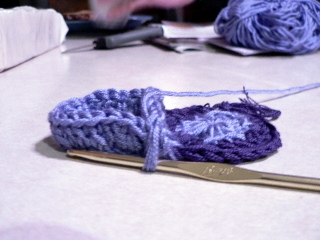
After ankle ribbing:
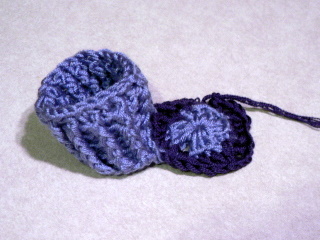
Completed booties:


No comments:
Post a Comment